Solar panel installation at home is a smart decision. It helps you save on electricity bills, promotes clean energy, and makes you less dependent on external power sources. However, careful planning is needed to ensure the solar panel system works efficiently and meets your needs.
This guide will walk you through the solar panel installation process step by step from evaluating your home’s solar potential to maintenance tips!
Step 1: Evaluate Your Home’s Solar Potential
Before you install solar panels, check if your home is suitable and explore the various types of solar panels available in India, including their efficiency, cost, and suitability for Indian conditions.
Inspect Your Rooftop
- Is your roof flat or slanted?
- Ensure there’s enough space for the panels. More space = better solar potential.
Solar panels work best when installed facing south in India. This direction gets the most sunlight.

Look for Shadows
- Are there trees, water tanks, or nearby buildings casting shadows on your roof?
- Install the panels in areas without shade for the best performance.
Understand Your Electricity Usage
- Check your electricity bills to see how many units (kWh) you use monthly.
- For instance, if you use around 300 units/month, you’ll need a 3kW solar system.
Pro Tip: The more sunlight your roof gets and the more electricity your home uses, the larger your solar system capacity should be.
Step 2: Decide the Right Solar System Type
Different solar systems work for different needs. Choose the one that fits your home:
|
Solar System Type |
Description | Best For | Advantage |
|
On-Grid Solar System |
Connected to the grid. Extra electricity goes to the grid, and you get power from the grid when solar isn’t available. | Cities or towns with regular power supply |
Reduces electricity bills through net metering. |
|
Off-Grid Solar System |
Not connected to the grid. Solar power is stored in batteries and used entirely at home. | Remote areas or places with an unreliable grid |
Completely independent, unaffected by power cuts. |
| Hybrid Solar System |
Combines On-Grid and Off-Grid. Has both batteries and grid connection. |
Areas with frequent power outages but also a stable grid connection |
Saves on bills and provides backup during power cuts. |
How to Choose the Right Solar System:
- If your power supply is regular, go for On-Grid.
- If you face frequent outages, an Off-Grid or Hybrid system works better.
If you’re wondering which on-grid or off-grid solar system is suitable for your home, understanding the differences can help you make the right choice.
Step 3: Calculate Solar Panel Capacity
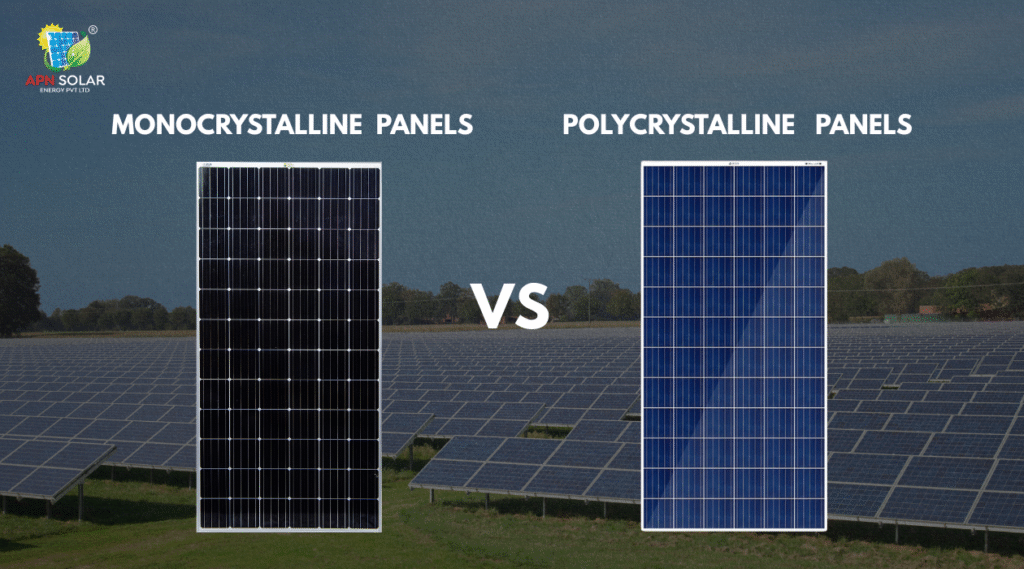
Before installation, calculate how much solar power you need (in kilowatts or kW). Your choice of solar panel type also impacts efficiency and space. Learn about the difference between monocrystalline and polycrystalline solar panels to decide what suits your home best. Here’s a simple formula to estimate your requirements:
Formula:
Required Solar Capacity (kW) = Monthly Units ÷ 30 ÷ 4
Where:
- Monthly Units = Units of electricity you use (from your bill).
- 30 = Average number of days in a month.
- 4 = Average sun hours available daily in India.
Example Calculations:
|
Monthly Units Used (kWh) |
Daily Units Needed | Required Solar Capacity (kW) |
|
150 |
5 | 1.25 |
|
300 |
10 |
2.5 |
| 450 | 15 |
3.75 |
| 600 | 20 |
5 |
Pro Tip: Round up slightly to cover seasonal changes in sunlight.
Step 4: Check for Government Subsidy Eligibility
To make solar cheaper, the Government of India offers subsidies for residential solar panel installation. These subsidies depend on your location and system size.
Some states also have additional discounts or processes through their DISCOMs (power distribution companies). Ensure your vendor is registered with the MNRE (Ministry of New and Renewable Energy) to claim subsidies.
To know the exact subsidy amount and how to apply, refer to our detailed guide here: [Read: Complete Guide to Solar Subsidy in India: PM Surya Ghar Yojana, Eligibility, Process & Benefits.]
Step 5: Choose a Trusted Solar Installation Company
Selecting the right solar company is crucial. Here’s how:
- Check MNRE Registration – Visit the national portal and go to the “Find Vendors” section. Select your state to find MNRE-approved companies.
- Look for Experience and Certifications – Choose companies with a proven track record (Check the list of Top 10 Solar Company In India, 2025)
- Read Reviews – Check customer feedback on Google Reviews or social media.
- Check the Services Offered – Make sure the company provides consultation, subsidy assistance, installation, and maintenance.

(Click here to view the list of approved vendors on the National Portal.)
Step 6: Site Survey and Feasibility Check
Before installation, professionals will inspect your roof and electric setup to:
- Measure the rooftop area and check for shadows.
- Assess the roof’s strength and direction.
- Verify your system type’s feasibility.
This ensures proper planning and prevents surprises during installation.
Step 7: Get a Detailed Quotation & System Design
After the survey, you’ll get a quotation that includes:
|
Item |
Details |
|
Solar Panels |
Type, wattage, quantity |
|
Inverter |
Capacity, brand, warranty |
|
Batteries (if used) |
Type, capacity, warranty |
|
Mounting Structure |
Material and design |
| Electrical Work |
Wiring, safety components |
| Subsidy & Taxes |
Subsidy amount, taxes, charges |
| Installation Cost |
Labor and commissioning fees |
For example, a 3kW system might include 9 panels (335W each), a 3kW inverter, and mounting hardware.
Step 8: Apply for Net Metering (For On-Grid Systems)
If you choose an On-Grid system, apply for net metering with your local DISCOM.
Steps to Apply:
- Submit your application with system design and quotation.
- Provide identity proof and ownership documents.
- Wait for DISCOM’s inspection and approval.
- Once approved, they’ll install a bi-directional meter.
Net metering helps you send excess electricity back to the grid and get credits on your bill.
Step 9 : Install, Test, Activate, and Start Saving
Your solar panels can now be installed. Here’s how it happens:
|
Stage |
Details |
|
Mounting Structure |
Securely fixes the frames. |
| Panel Fitting |
Panels are mounted on the structure. |
| Wiring and Grounding |
Connects panels to the inverter and ensures electrical safety. |
| System Testing | Ensures everything works optimally and generates power efficiently. |
Final Handover:
- After a final inspection, the system is activated.
- If it’s On-Grid, the net meter is installed.
Start using solar energy and watch your electricity bills decrease!
Step 10: Maintenance and Cleaning Tips
To keep your system efficient:
| Task | Frequency | Details |
| Panel Cleaning | Every 3-6 months | Use soft water and a soft brush to clean dust and dirt. |
| System Inspection | Annually | Get a professional inspection of wiring and inverter health. |
| Performance Monitoring | Ongoing | Use apps or inverters with display units to track output. |
Maintenance ensures your solar panels last for 20+ years.
With this guide, you can confidently plan your solar panel installation and make the most of renewable energy for your home. To maintain peak performance, learn how to clean solar panels safely and effectively. Start today and enjoy the benefits of clean, green power while saving on energy bills!
Frequently Asked Questions
1. How do I install solar panels step by step at home in India?
To install solar panels, assess rooftop space, choose system type, apply for subsidy, hire a certified installer, set up mounting, connect panels to inverter and grid, install net meter, and get DISCOM approval. Always follow BIS and MNRE guidelines for safety.
2. Do I need permission to install solar panels at home in India?
Yes, you need permission if applying for net metering or subsidies. Register on the National Portal for Rooftop Solar or your state’s DISCOM portal. No permission is required for off-grid solar systems not connected to the main power supply.
3. What is the 20% and 125% rule in solar panel installation?
The 20% rule recommends leaving 20% rooftop space clear for safety. The 125% rule allows solar system size to exceed your average energy use by 25%, mainly applicable to net metering systems to ensure grid stability and avoid overfeeding.
4. Can I run 2 ACs on a 5kW solar system?
Yes, a 5kW solar system can typically run 2 energy-efficient ACs along with basic home appliances during the day. However, usage depends on sunlight, AC tonnage, inverter capacity, and battery backup (if off-grid or hybrid setup).
5. What is the cost of a 5kW solar system in India with subsidy?
In India, a 5kW rooftop solar system costs around ₹2.5–₹3.5 lakhs. After government subsidies (up to 40%), the net cost drops to about ₹1.5–₹2.2 lakhs depending on location and installer. For detailed costs and subsidies, see our solar panel installation cost guide.
6. How many kW solar is required to power a house in India?
Most Indian homes require a 3kW to 5kW solar system based on electricity usage. A 3BHK with fans, lights, fridge, and 1 AC typically needs 4kW. More appliances or higher usage will require increased system capacity.
7. How many solar panels are needed to power a house?
To power a typical house, 8 to 15 solar panels (each 400W) are needed depending on your electricity needs. For example, a 5kW system would require about 12–13 panels, assuming standard panel sizes and optimal sunlight.
What’s Next? Fill Out the Form to Install Solar Panels!
Solar panel installation makes financial sense, and it’s great for the planet too. Now that you know all 10 steps, you’re ready to get started. Fill out the form today and take the first step toward clean, renewable energy with the best solar company in India!